Lesson 10: Macaroons
Lesson 11: Macaroons
my style of macaroon, i say it looks like eyes but according to TOP, it looks like boobs..(ehem..hem..). looking back now, it really looks like something different from eyes XD
Lesson 11: Souffles (calvados souffle)
Lesson 11: Souffles (crepe souffle)
for the souffle lesson, we get to choose to present the calvados souffle or the crepe souffle. as other groups chose to present the crepe souffle. my group chose to present the calvados souffle. challenging!!!!
it's easy to make souffles, just ensure your meringue is stable enough (which means not to fiddle around with it too much, not to fold too much) and you'll come up with a beautiful puffed up souffle!!!! yumsssss~
the challenging part of the calvados souffle is the apple. overbake the souffle a little, and you'll end up with a mashed up apple cup. good thing we stood infront of the oven while we were baking the calvados souffle, pheww~ our apple cups are still nice and stable, and the souffle inside are nice and puffy!!!
but our crepe souffle weren't that lucky though...we were all busy decorating our calvados souffle and totally forgotten about our poor crepe souffles that are baking next door!!! a little burnt but still yummy!!!
Lesson 12: Transparence of creamy chocolte, brownie, raspberry with cocoa bean "nibs" crisps
Lesson 12: Transparence of creamy chocolate, brownie, raspberry with cocoa bean "nibs" crisps
this dessert is not difficult to make, for the layers: creamy chocolate - creamy raspberry - fruits in cubes - tempered dark chocolate disc - creamy chocolate - cocoa glaze
the chocolate disc that have to be measured and cut accurately is placed on top of the fruits and have to fit perfectly so when we add the layer of creamy chocolate on it, it will have a really nice transparent layer in between the fruits.
we though we just need to present the larger glasses and not the small ones, so we focus more on the larger glasses, slowly decorating, cleaning the plates repeatingly so theres no fingerpints on it. but at the end, where there is only 15 minutes left, we were told that we have to present both big and small glasses. i was like "WTH!!!!!!!!!!!!!!!! BUT WE HAVE NO MORE COCOA GLAZE!!!!". everyone in class panicked. but for the sake of our results, we managed to ishh up some chocolate glaze in 5 minutes.
Lesson 13: Frozen nougat served with apricot financier, raspberry coulis
Lesson 13: Frozen nougat serve with apicot financier, raspberry coulis
we worked in groups again. a type of cold dessert. the most important thing when you serve cold dessert is not to fiddle around too much. the dessert have to be served immediately after it is taken out from the fridge or it will melt really really fast.
Lesson 14: Spiced tropical fruit kebabs with orange soup ad sweet couscous
COUSCOUS!!!!! something like rice i think....i don't like it.
the whole class works as a team for this practical. at first, it was relaxing and everyone was wandering around trying to find something to do (actually..it was only me. everyone was busy XD)
we have to scoop up ice-cream quenelles (oval shape) using a spoon. the spoon used is "deeper" than normal dinner spoons. soak the spoons in lukewarm water before using. to scoop, "imerge" the spoon into the ice-cream and scoop, scoop twice to get the shape. urgh...hard to explain in words. youtube!!! hehe
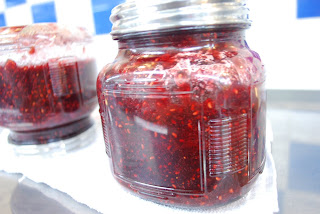
Lesson 15: Strawberry jam with raspberries and balsamic vinegar
Lesson 15: Rose Loukoum
for this class, stand and stir constantly.thats my only advice.
Lesson 16: Honey Candy
Lesson 16: Praline and coffee berlingots
first time pulling sugar. i was so high i oversatinised (pulled too much, incoporated too much air in it, causing it to lose it's shine). we then have to wrap the filling in a thin piece of sugar and wrap again with a sugar ribbon. after that the sugar is cut in small pieces.
obviously, the products in the pictures are not done by me, but mine looks similiar!!! for real!!


.JPG)
.JPG)


